Build Your Own Differential Stand - Page 2
In this page you can see some of the mock up of the assembly and the completed project. Note, please read about the bearing adjusters which was a problem I only found out about while attempting to adjust the one side that is close to the arm.
Link Back to PAGE 1 of the Differential Stand Project
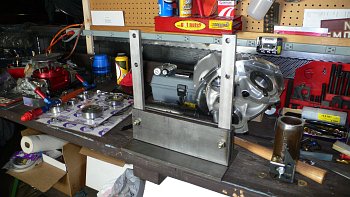
Diff Stand Mock up 1
Here are all the parts assembled but not welded. The mounting pipe is seen to the right and has been sanded clean in the weld area.
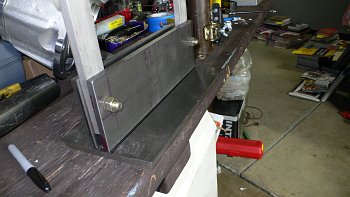
Diff Stand Mock up 2
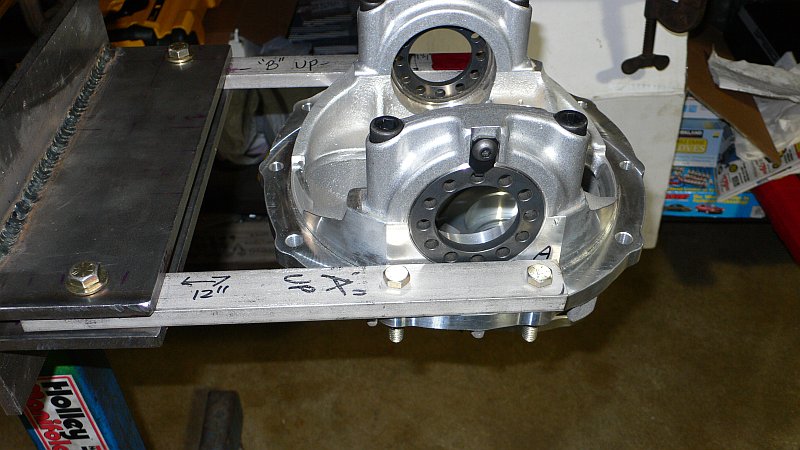
A little closer view of the mounting plate and swivel plates. Note that I drilled the holes for the mounting arms about 1/2" offset towards the front of the mount. And and IMPORTANT note is that you need to leave some space behind the arms if you want them to be able to move.
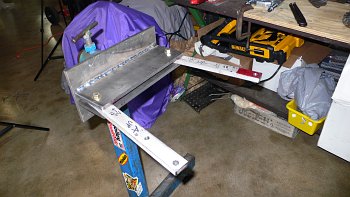
Mounting Arms
You can see the side view of the space left behind the arms to allow them to clear the backing plate when they move. You can drill additional holes for different arms and spacing if needed. The 12" plate worked just about right for the 9" Center.
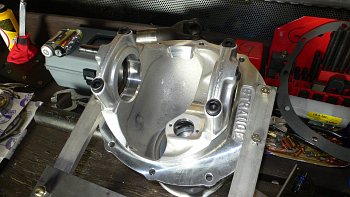
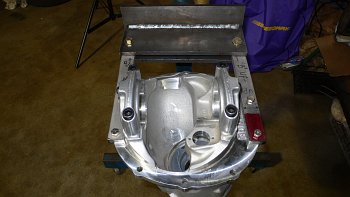
9" Bolted In
The 9" Mounting holes to the arms are NOT symmetric, mark them off with the arms bolted into the swivel plates. NOTE: on one side you need to ensure that you can still adjust out the bearing retainer. You may have to drill the holes closer to the edge of the arm and/or do some grinding in the arm to give the bearing adjuster some room to come out.
Mock up looks good!
Everything looks good in the mock up, but as mentioned above if you catch it early you can avoid some grinding on the arm. One side has a ton of room the other not so much.
Welded and On the Stand
Everything was welded up with the MIG, put on high and go. Note that the arms are left in during the welding with the bolts snug and a piece of masking tape on both side to make it a bit thicker so it would not be too tight to move once removed (tape removed too).

Differential Stand Parts Listing
In most cases you could use a bit thinner material except for the arms.
1018 - FLAT BAR COLD FINISH 12" x 0.375" x 6" 1018 Cold Finish Mild Steel Rectangle Bar
1018 - FLAT BAR COLD FINISH 0.5" x 6" 1018 Cold Finish Mild Steel Rectangle Bar
1018 - FLAT BAR COLD FINISH 24" x 0.375" x 4" 1018 Cold Finish Mild Steel Rectangle Bar (or 2-12" pieces)
STAINLESS STEEL FLAT BAR T-304/304L 0.5" x 1.25" T-304 Stainless Annealed Rectangle 2 x (12") Length
NOTE: I would recommend NOT using stainless here. The often used magnetic mount dial indicator becomes more of a problem to mount since this stainless is non-magnetic.
1018 - FLAT BAR COLD FINISH 0.5" x 1.25" 1018 Cold Finish Mild Steel Rectangle Bar One Ft. (12") Length
2.375" OD x 0.25" Wall Mild Steel A513 Type 5 DOM Tube One Ft. (12") Length
Various nuts and bolts to hold it together.
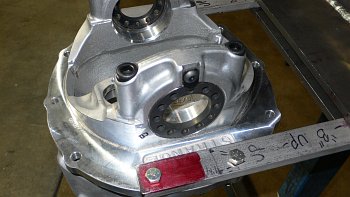
Finished with 9"
After cooling everyting is bolted back up, with the tape cleaned off of the arms, bolts replaced with heat treated versions and nylocks.
Bearing Adjuster
This is the problem side of things, note that it looks OK but actually the bearing retainer need to be able to come out. I didn't realize this until AFTER I started building the housing up. I did some creative grinding in the arm to allow it to come out a bunch.
Bearing Adjuster
This is the other side, plenty of room between the arm and the adjuster.