Ford Explorer Radiator Replacement - Page 1
The first step is to drain the radiator. Obviously wait for the car to cool down, do not do this with a HOT engine. It's generally a good idea to remove the positive battery cable before you get started too. Get a small pan and place under the passenger (right) side of the radiator. Look for a small plastic fitting that looks like a wing nut. Unscrew the wing nut plug and let the coolant drain into the pan. You may have to stop to empty the pan if it's a small one. Let's try not to get antifreeze all over the place it's a mess and very slippery! While this is going on you can remove the air intake hose to the throttle body. You just need a screw driver for that. After that's done un-clamp the air filter band and move the assembly out of your way. Watch out for wires, you may have to remove the connector on the intake assembly as it may be too short. Once you have drained the radiator you can pull the top and bottom hose. The bottom hose will have antifreeze in it so be ready with the drain pan.

You can Navigate to any of the pages in this project by the BELOW drop down menu or use the NEXT or PREV links
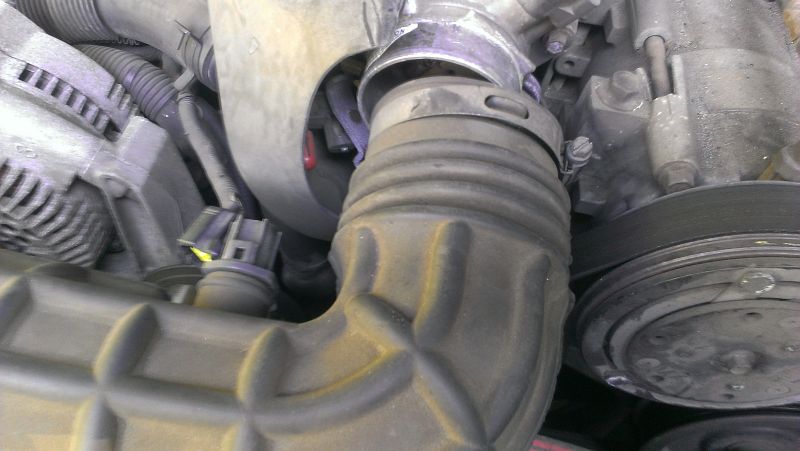
Air Intake Hose
Remove the large hose clamp, you just need a flat blade screwdriver. Then Remove the sensor plug wire. You make have to squeeze the connector to release the tabs that lock it in place. On the other end of the rubber intake is the air filter box. You need to remove the clamp and this should allow you to move this entire rubber intake out of the way.
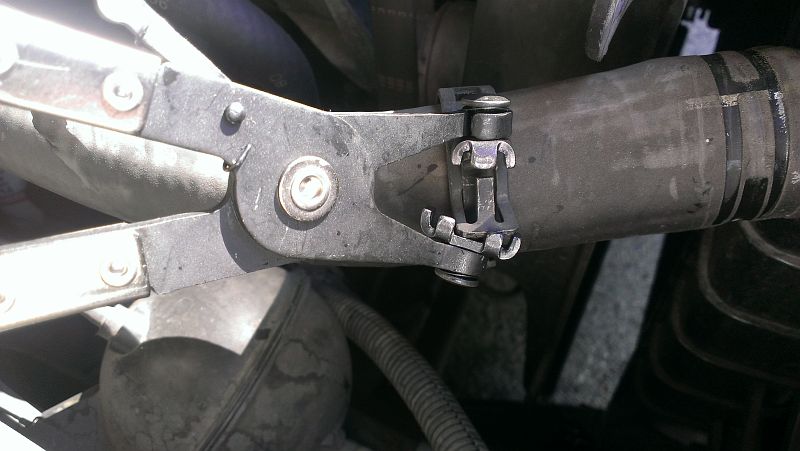
Hose Clamp Pliers and Pulling Hoses
The stock Ford hose clamps are spring steel. They are a source of many leaks, and can often be the source of your trouble when it's not at all a radiator problem, so check these areas for leaks first. I have a set of OTC 4502 Hose Clamp Pliers and they work very well with this type of clamp. They are inexpensive and if you do a few jobs they are worth it vs. Using regular pliers. Just drag the clamp back over the hose so you can pull the hose off the the radiator. If you are going to re-use the stock clamp leave it on the hose, otherwise when you remove the hose from the radiator just use the pliers to slide it off, watch out they can shoot out like crazy if your not careful. Bottom hose is the same, just be ready for a bunch more fluid to drain when you pull the bottom hose off the radiator.
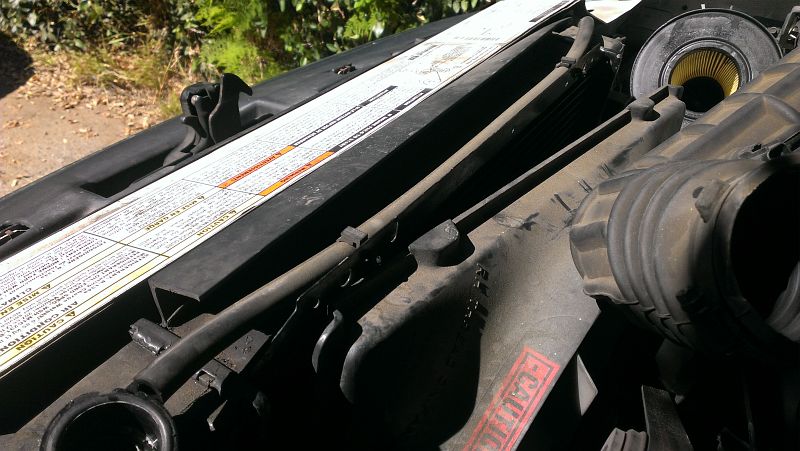
Overflow Hose
The Overflow hose come out of the radiator cap spout and is held in with some plastic clamps and ultimately ends up connecting to the overflow bottle. Another source of leakage is the overflow hose at the radiator cap connection as the hose gets old and cracked. Look for leakage at this point too.
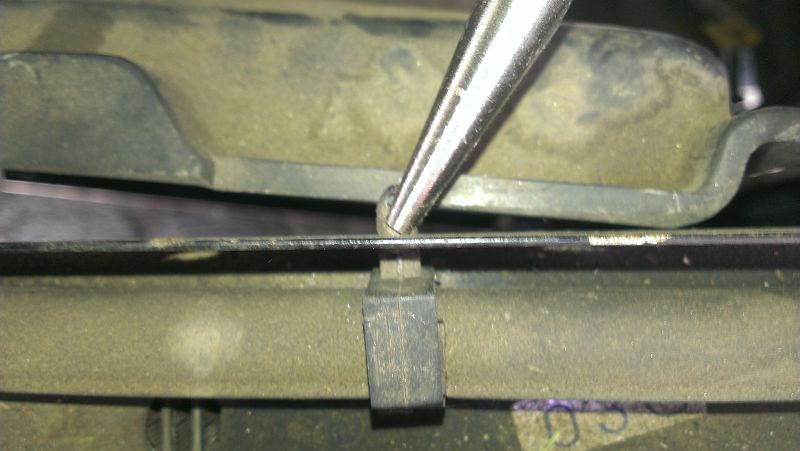
Remove Overflow Hose Clamp
These clamps remove by squeezing the back end and pushing them through. Once you get it started it will just push through the hole. Leave attached to the hose as these will re-install on the new radiator. Once all of the clamps are removed, pull the hose out of the way.