Disassembly


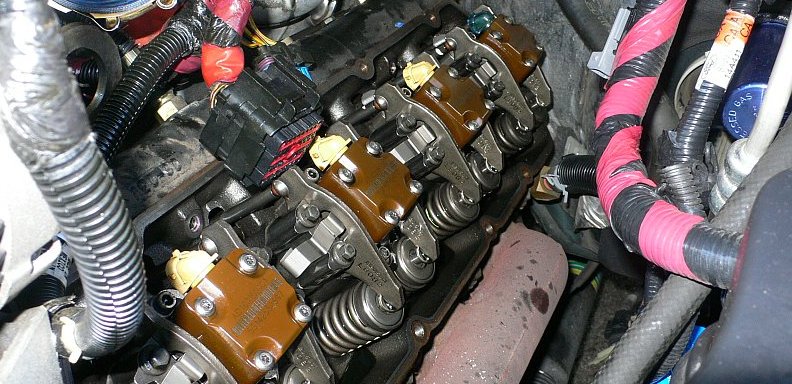
Here is were I start to actually do some work. Do your normal disassembly stuff prior to getting into the engine. This includes REMOVING THE POSITIVE BATTERY CABLES FROM BOTH BATTERIES AND DRAINING THE COOLANT, You will need a bucket or a pan for a huge amount of coolant that will be mixed up with some Diesel. Plan accordingly. I didn't remove the entire Air Box assembly, it's likely a good idea to do so as it does give a bit more room. Also I started with the EASY side. The driver side has much less to remove to get to the meat of the nut. The Passenger side is a very different story. Both are plagued with valve cover bolts that are difficult to reach. Also if you have a camera it's a good time to take any pictures of things that 'You are sure you will remember how they go back together' but actually will totally forget after the second sixer of beer.
Powerstroke Drain Radiator
Powerstroke Remove Air Box
GTSparkplugs Header
Click for Contact Page Click for Contact Page
Powerstroke Remove Intake Hose
Powerstroke Intake Hose Removed
Powerstroke Airbox and Filter Removed
Powerstroke Breather
Powerstroke Intercooler

Drain the Expensive Coolant BEFORE removal


You should do a few things before getting into the disassembly stage, Drain the coolant. It's likely loaded up with diesel so get a bucket and figure out what you will need to do with the coolant / Diesel mix. You are going to flush the system like crazy afterwards so don't worry about that now. Also it's a good time to remove BOTH battery connections.

Remove Air Box


Unplug the Air Flow Sensor plug and start to remove this assembly. I only removed the top part of the air filter box. It may be easier to just remove the entire assembly (battery included) but I left it in being lazy.

Turbo Intake Hose


Remove the hose clamp at the TURBO. Note that you will need to remove 2 Bolts that hold the empty plastic housing between the Turbo and the Air Filter Box. You may have to remove the Air Box hose to get the the Breather which as I recall is under it. It removes with 2 Phillips heads, and be careful the screws have O-Rings on them as well as the Breather on the Bottom.

Intake Filter and Hoses Removed


Starting to clear up. You can see the support bracket that holds the piping on the engine. You can also see how tight the motor fits to the firewall making the last valve cover bolt difficult to get at. The 2 holes in the valve cover mate to the breather and seal with 2 O-Rings. Watch out when you pull this apart so things don't get lost.

Breather and Intake Hose


Closer view of the assembly and how it goes together. You don't need to remove the breather from the assembly. Remember keep parts together when possible.

Valve Cover Breather


Here is a close up of the Phillips head screw with the small O-Ring. Don't lose these...

Start Removing the Intercooler Pipe


Now that things are opened up a bit, get the intercooler pipe out of the way. This is where removal of the entire Air Box would have been nice, but really not that bad to get it out.
Prev
Next
You can Navigate to any of the pages in this project by the BELOW drop down menu or use the NEXT or PREV links
Powerstroke Turbo Pipe

Remove Pipe From Mr. Turbo


Well technically it's not going to the turbo but close enough for a witty comment. Now get the other side of the pipe. Don't get nervous if you see oil in the pipe. You can leave the Turbo manifold side of clamp and blue hose attached. It's also a good time to make sure these are still in good condition. If not order up some while your working on the car.