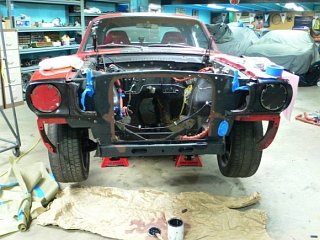
Mustang Radiator Upgrade
After sometime on the track in the summer and with more horsepower capable engines I began having issue of the engine running too hot. While the warmed over 289 worked OK in less than summer heat, it was the 100F Willow Springs track days that were taking its toll on both the driver and the engine. I could do something about the engine, the driver is another story...
This swap was to replace the top tank Fluidyne radiator with a more efficient side tank version. The Radiator that seemed to fit the bill was oddly the Fluidyne 67-69 Camaro radiator. It had nice mounting ears, and was just about the right size to fit into the Mustang frame rails. The only issue was to remove the blockage in the front radiator support. Other than that it was a very easy swap with only some minor hose changes to make it all fit. So if you need a cooling system upgrade, and are not worried about cutting the car a bit, this will be the last time you have a boil over!
Link to PAGE 2 of the Mustang Radiator Upgrade
Fluidyne Camaro Radiator
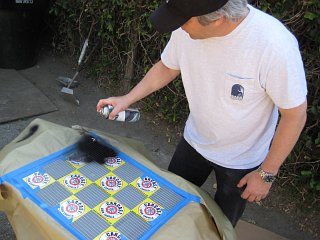
This was the radiator prior to paint. Doing checkers is always a pain but I ended up having some leftover stickers that ended up being just the right size for the pattern.
Why paint it? Well I have a checker board theme going on the oil cooler and Fluidyne didn't put one of their logos on the front so I'll have at it. This is the fun part of the project!
Checker Board Fluidyne
After some complex thinking and pulling stickers off the pattern looked good. This was actually very easy since the worthless stickers seemed to now have a practicle use.
Masking and Painting
Some generous use of masking paper and a bunch of 3M Scotch Brand Blue tape keep the radiator clean. Then a can a flat black paint (NOT PRIMER).
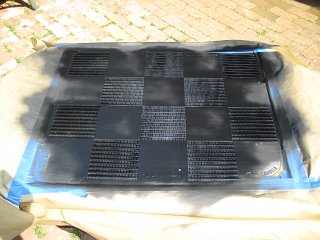
The Fluidyne Unmasked
Now after a nice sun baked paint job, time to start peeling the tape and the stickers. This is also the fun part!
Finished Painting
When painting the radiator you need to hit it from all different angles to get the fine black finish I'm looking for. Takes a bit of time to let things dry then hit again. Picasso I'm not, but damn I can spray a radiator,
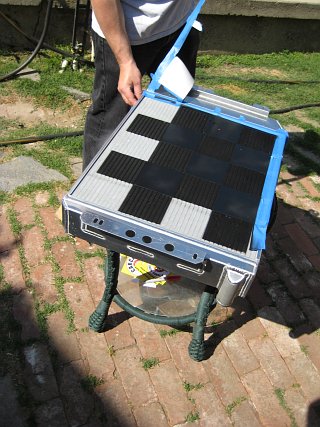
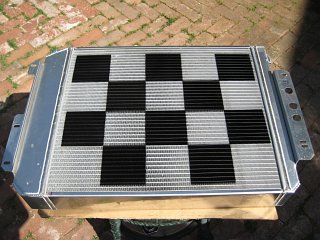
The Finished Radiator
This is the finished product. While not a waste of time, a time waster. Still looks better than the raw aluminum IMO.
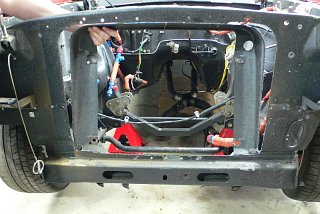
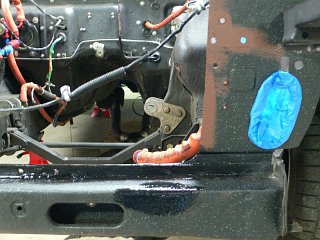
Cutting the Radiator Support
The piece in hand has to be cut away. It's pretty simple, mark your cut to just the edge of the indentations where the old radiator is mounted to. The idea is you need a FLAT surface to mount the new radiator as well as open up the frontal area some.
I used an air cut off tool with a thin wheel to make the cut. You can do a nice clean cut even on the curve parts. If you use a saw expect an ugly mess on this sheet metal. Plasma cutter might work well too.
Mustang Radiator Support Cut
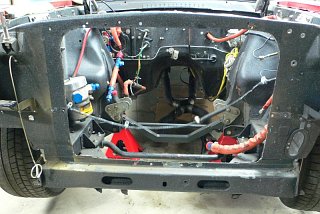
Clean up the mess from the cuting wheel, and grind/sand the edges to clean up the cut. Watch out for sharp edges when you do so.
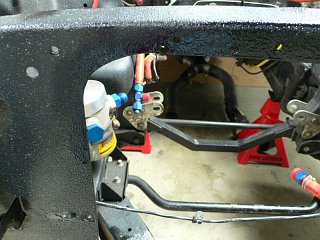
Back of Radiator Support
The back view before any grinding and sanding. The surface for mounting the new radiator is flat. One thing that you don't get by remove the stock support is a radiator that is tilted to keep it parallel to the front of the engine. This might matter IF you were using a fan shroud, but since I'm not, it's not an issue.
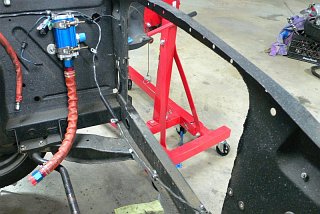
Smooth and Primed
After sanding the openning and makeing it nice and smooth I removed a bunch of the heated, burnt and crusty paint. After that I used some heavy duty Rustoleum primer (paint brush style) to seal any exposed edges.
Now is a good time to get the radiator and mark any needed mounting holes, as well as mouting for the screen mesh.
Prime and Paint 1
After some thick primer that needs to be coated with a black paint so the Trunk Paint will have a background that is black.
Prime and Paint 2
Another shot of the corner of the cut with some nice thick Rustoleum black.