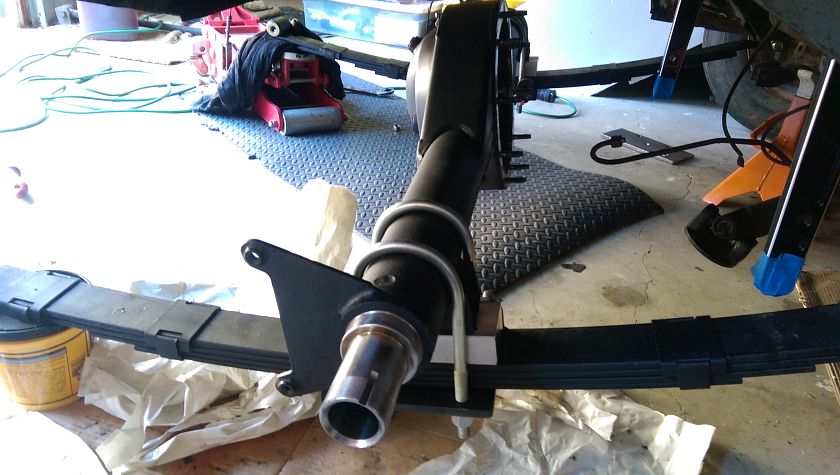
Sunbeam Tiger Rear Axle Upgrade
With yet another crazy idea of upgrading the stock Sunbeam Tiger's rear end to something more durable and suitable for a high performance small block Ford also with the expectations of good rear disc brakes my options ended up being these -
OPTION 1
Replace the guts of the Dana 44 with a more modern differential such as a Torsen or Clutch type and upgrade the axles to a modern Dana 44 so this could be done. As a side benefit one piece axles would have to be made to get rid of the 2 piece (read as weak) axles the stock tiger uses. In addition Either fabricate some disk brake brackets for Wilwood Dynalites or chop axle ends and weld on 9" style for easy selection of brackets and direct bolt on kits.
OPTION 2
Replace everything with a fabricated Ford 9". I have some suitable gears in the garage, an aluminum drop out, and a Detroit TrueTrac (Torsen style) differential. Brakes could bolt up using stock Wilwood kits.
OPTION 2+
Same as Option 2, but do a full floating 9" with cambered ends.
Option 1 was a contender for a long time. I had collected some of the parts, but it would need work done by a competent rear end shop.I contacted Curries who is not super far so I figured they were my best shot. I contacted them with pricing and with my parts, their assembly and fabrication, new axles, etc it came to over $1200. I didn't think that was too bad given some of the amount of work, but hated chopping up a Tiger Dana 44 for this. I thought that I could at least sell the Tiger part and recoup some of the money for a better Ford 9"
So onto Option 2, it started out being a really simple task, just duplicate dimension of the Tiger Dana 44, mounting pads, shocks mounts and in the proper width and I would be good.
Finally arriving at Option 2+ Well as you know with me, one thing leads to another and I had the brilliant idea of using a floating style rear end. Why? Because. That being said they offered a few things that I like, one was CAMBERED solid axle rear end without dealing with bending housing tubes. Also in the event of a axle failure (not really likely with a 31 spline aftermarket axle on this type of car) the wheel will stay on the car.
Option 2+ it is!
So now to find a company that makes these parts. A short few came up, even fewer that made 4.5" Bolt Circle (PCD) for Ford rims. Ended up being Coleman Racing and Speedway Engineering. The next problem was fitment. While I though this was going to be easy, a new problem came up... BRAKES. On a standard 9" the brakes are mounted on the axle flange and are push outwards. On a full floating style the brake mounts inside since their is no flange. This normally is not a problem on a 'regular' sized car but on the Tiger it is.
I contacted both Coleman Racing and Speedway Engineering and acquired dimension for their hubs and related. After much anguish it seems that neither would work. The Speedway Engineering was a more compact hub but still didn't leave much room between anything. The Coleman Racing mounted the brake too far inwards to even try. So after hours of measurements and mocking up (both computer and physically) I came up with a simple solution...
Make the axle wider! Yep, that's it's. My thinking was that I could make up the wider offest (.75" each side) in the rim offset. Seems simple enough.
Axle ordered, measurements given to Speedway Engineering, who, by the way were fantastically helpful in getting me the housing fabricated.
Some notes on the Parts -
Speedway Engineering ModLite hubs and housings
Wilwood 10.75"x .81" Vented Rotors
Wilwood Dynapro 6 Piston Calipers (Newer Style Dynalite)
57 Chevy Leaf Spring Axle Mounts - For 3" tube housing, from Moser as I recall
Custom Leaf Spring Plate with shock and sway bar mount
QA1 DS701 Shocks
Below are some of the pictures for fitment of the rear end. Some also of the old Tiger Dana 44
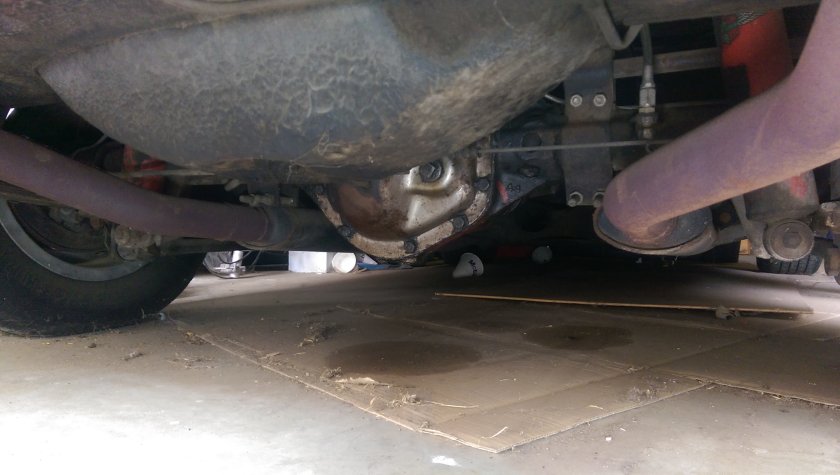
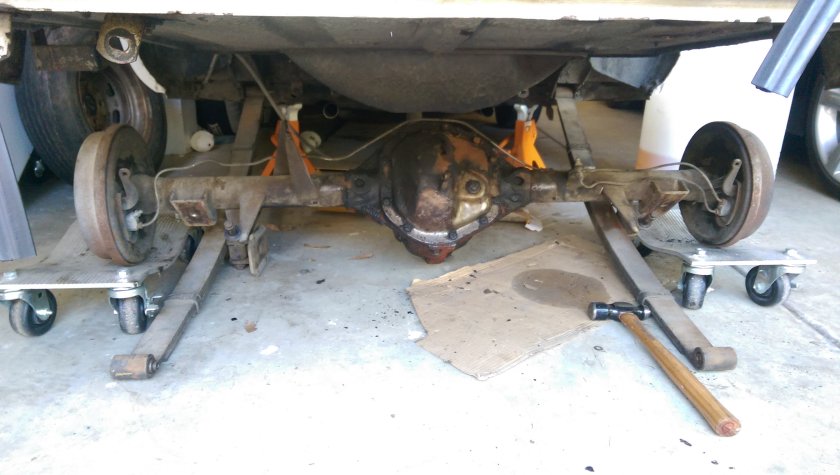
The Stock Dana 44 in the Sunbeam Tiger
This is how things looked before I started. Mufflers were Sawzall'ed off and put into the recycling bid. Car put on jack stands and the mess of unbolting begins
Tigers Dana 44 Removed
After lots of bolts, brake lines, e-brake cable and related all that was left was the leaf springs. With the aid of a floor jack I remove tension from the springs an removed the bolts holding them to the chassis. Gloves help here, watch out and be careful that's all I can say at this point.
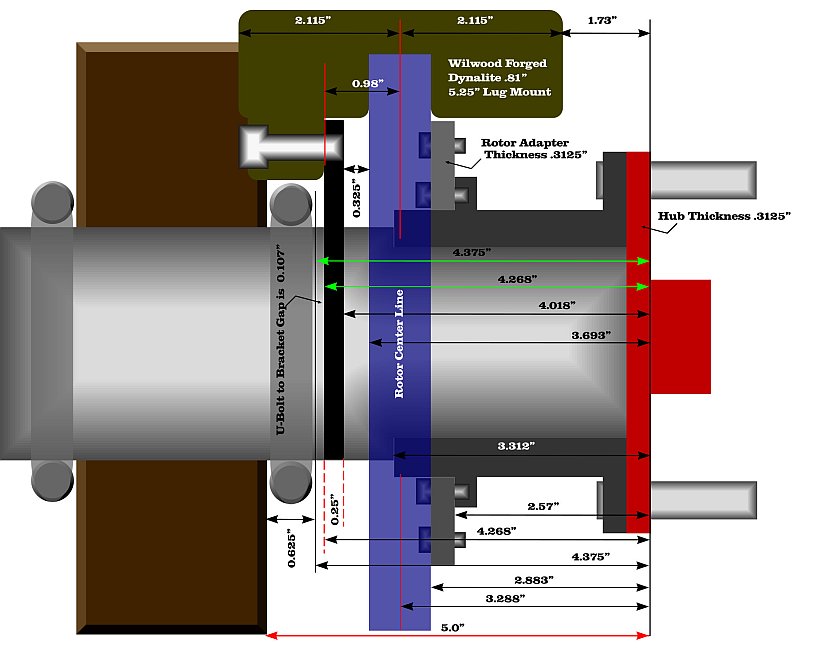
CAD Mock up of Speedway Engineering Modlite hub
With dimensions in hand I took all the measurements I could on the Tiger rear end. To fit the all the crap on the very short Tiger axle was not possible with the stock width, which if you ask was 51.5" Drum to Drum. Move out the axle width .75" will allow the brake (and inlet fitting) to clear the inner fender. Note that the spring sticks out further then the inner fender well.
Speedway Engineering
Speedway was about 15 minutes from my home so was very convenient. Again they deserve special mention for helping get measurements sorted, lending me an axle tube and related parts. A shout out to Ken and Frank for all their support!
Speedway Engineering Mod-Lite Housing
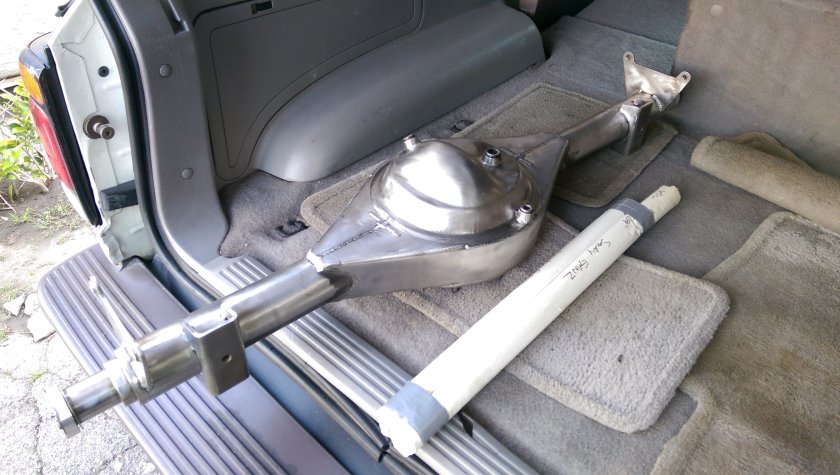
This is what is looked like when I picked it up a few weeks later. The housing is a totally fabricated piece, with strong center housing and my 57' Chevy leaf spring perchs. The housing has a vent, fill plug and a very helpful drain plug. The brake brackets are welded on at the precise angle of the camber all ready to go. The (short) crowned axles are still wrapped up.
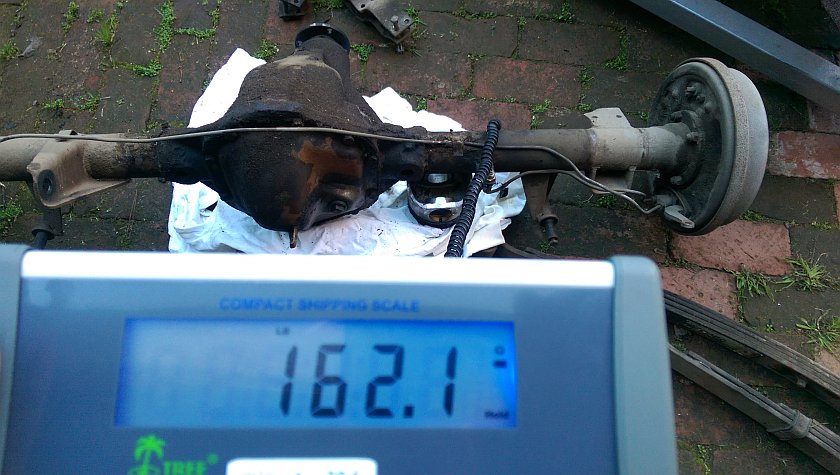
Weighing the Tiger's Dana 44
After some conversation that the Ford 9" was going to greatly out weight the Dana 44, I had to follow up with some numbers. The Tiger's Dana 44 was put on a shipping scale with all the trimmings. Note the Power Stroke piston to balance it, it's weight was not counted. The Tiger's rear end came in at 162lbs. The weight of the Speedway Engineering Mod-Lite came in at 173 lbs give or take a couple. Every part on the 9" is way more robust from brakes to the diff. Yes, I did use a Strange Engineering aluminum drop out to keep weight down. Overall if I had went with a regular Non-floating 9" I think the weight would be very close to the stock Dana 44.
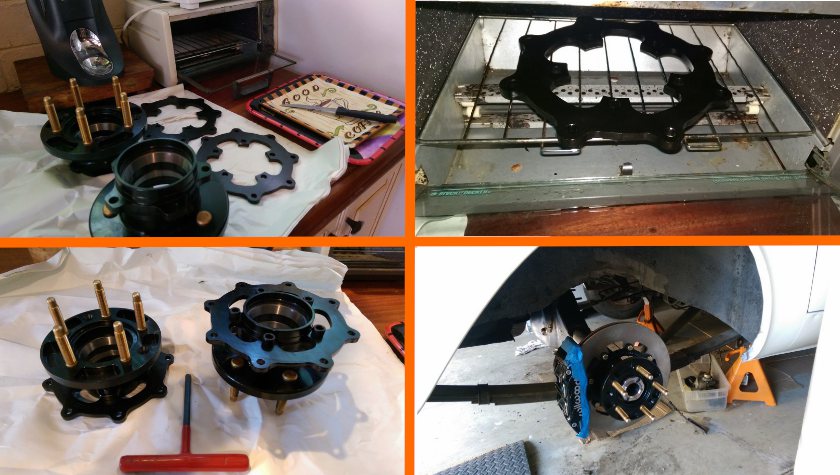
Speedway Engineering Brake and Hubs
Time to work on the rear axle hubs. The Speedway Engineering Mod-Lite hubs need a brake adapter. The recommended way was to heat it with a propane torch, but I figured I would use the toaster oven since I was going to cook dinner any-a-ways. After heating the adapter it drops over the hub and you secure it with some socket head bolts. I did that first then removed them one by one and added some Loctite and the lock washer. The last picture show the everything on the axle. This was an early mock up... Remember mock up early and often.
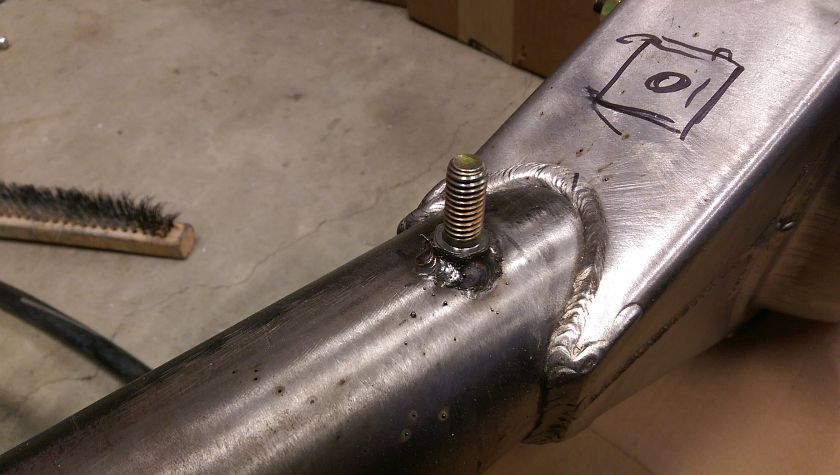
Welding Brake Line Tee Bolt
One thing I forgot to have the folks at Speedway Engineering do was weld a bolt (or nut) for attaching the brake line Tee Fitting. The Sunbeam Tiger has the brake line on the opposite side of 'normal' cars since the brake booster is on the passenger side (left drive cars) . What I did was C-Clamp a bolt to the top of the housing that will work with the common ford (or aftermarket) brake line that will go from the chassis to the axle housing. I taped up the threads to keep any welding spatter from messing with the threads. The minor heat won't do much to the axle, so not worried about it changing camber.
Ford 9" Primer Job
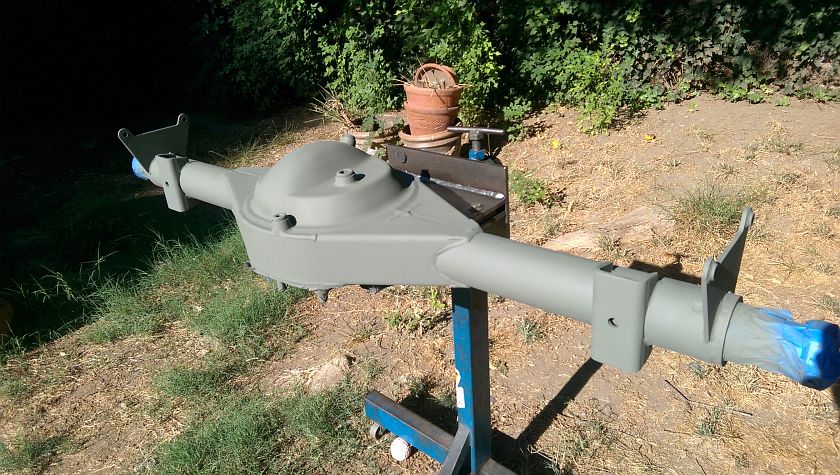
Using the Differential Stand project for a second purpose. The stand can bolt up a drop out or right to the axle housing. The over built stand didn't break a sweat holding the small Tiger axle. I cleaned the housing and then primered it with some Rustoleum self etching primer and let it get good and dry.
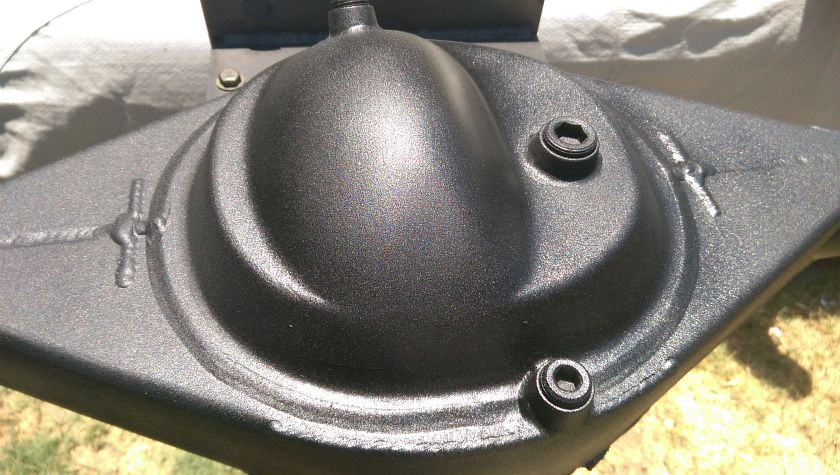
Ford 9" Paint Job
I initially pained the housing with a thick Rustoleum brush on oil based paint. After that let it dry over night. The paint is much thicker then a dozen coats of aerosol paint. It does take a while to get hard. Do it in a cool place and you will be amazed how well the finish is with a paint brush. After it got good and hard I gave it a top coat of Rustoleum black texture paint to give it a very slight wrinkle looking finish. It's very light and this is my first experiment with this paint in automotive. I use it to paint electronic chassis (Tube Amplifiers) and love the look. It may be something that doesn't work well for automotive use as it may be a collector of grease and dirt... Will have to see.
Axle Brake Line Routing
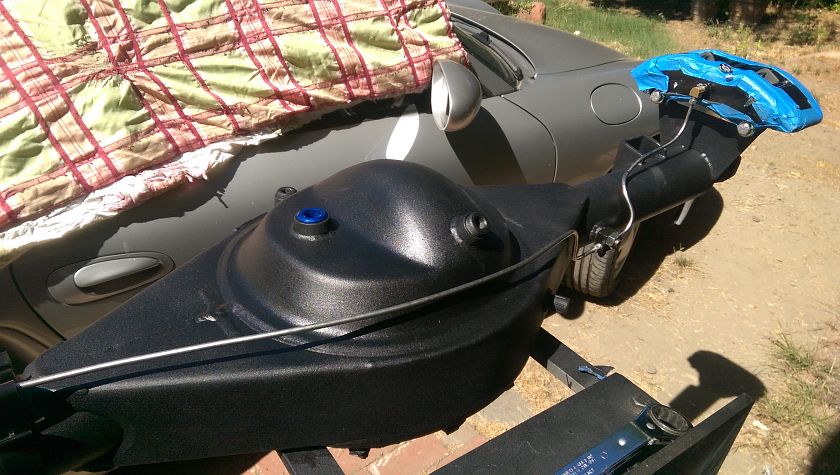
Time for the brake line routing. The Tee fitting is bolted down and I routed the stainless lines as best as I could as it gets tricky to get length correct when you have bends near the ends of the line where it becomes difficult to flare. I used a 90 degree brake line fitting on the Wilwood calipers to help keep things away from the inner fender. One thing that is missing is the additional clap on the middle of the housing that I added to hold the longer of the lines down and keep it from vibrating. I used the Master Cool Hydraulic flaring tool to do the lines as stainless is much more difficult to do with the simple style tools.
Ford 9" Inner Axle Seals
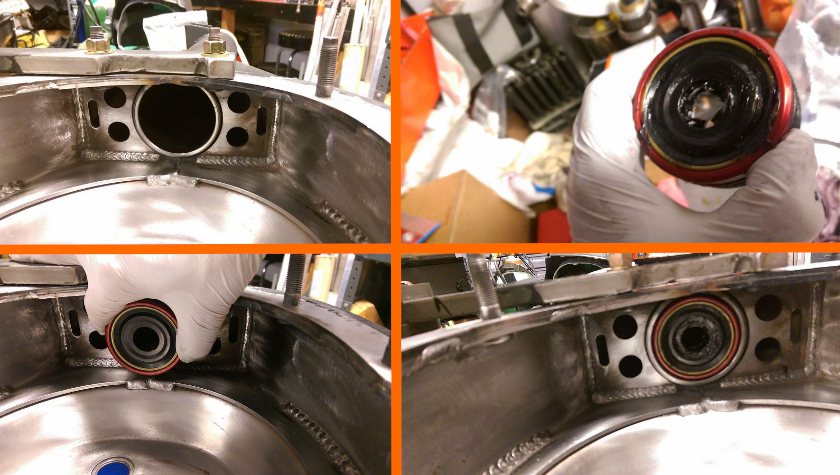
The Speedway Mod-Lite package I got came with inner axle seals. These keep the oil in the center housing and out of the axle tubes. This overall is a very good thing. This is a triple lip seal with the center filled with some Royal Purple GL2 bearing grease as prescribed. The seals have o-rings on the size and press in with some slight mallet work.
Wheel Bearings and Seals
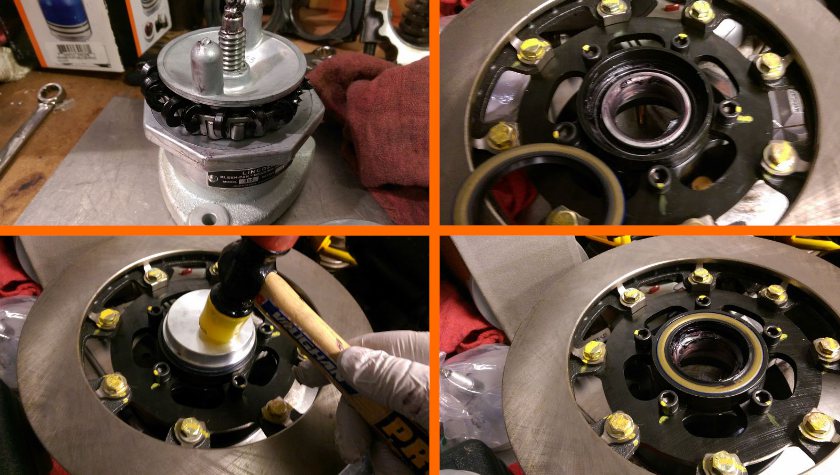
Well wheel bearings and one seal. The rotors were bolted with locking flange nuts and all bolts marked after they were torqued. Then grease the wheel bearings with this nifty pressure style bearing packer. And finally pound the seal in with a seal driver (well a hammer and a bearing installer). Try to keep grease off the rotor for obvious reasons, but plan on cleaning it prior to putting pads to metal.
Leaf Spring Lowering Blocks
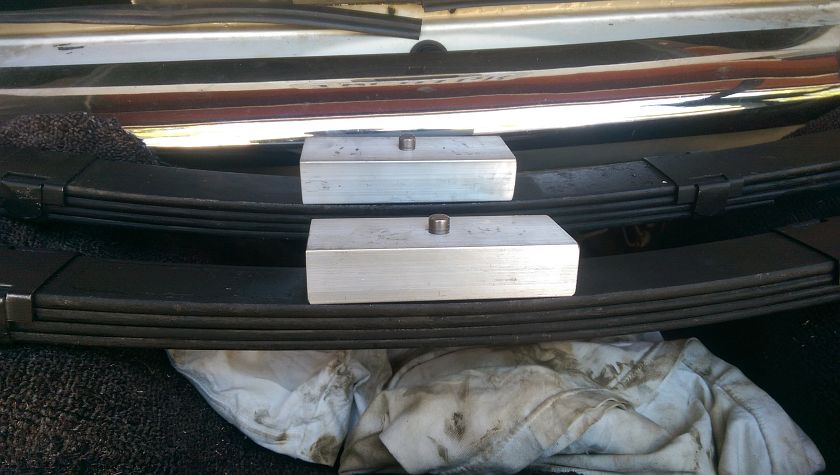
The car was sitting pretty high prior to messing with the axle, figured I would take a guess at dropping the height while I have things apart. The 17" wheels and tires are a 25.6" diameter vs. The 23" for the stockish 13" wheels that were on it. I found some 6" 6061-T6 Aluminum block scrap on eBay and picked it up. While the springs were at the spring shop I picked up a couple leaf spring centering bolts (long ones) and drilled some holes centered on the block. The Tiger uses a 5/16" centering bolt. I clamped the springs prior to installing and still have a bit of visible gap. I think this will come out once mounted on the axle. If not will taper the ends a bit. I picked up some 2.25" square blocks in case I need to drop it even lower. I don't want to use too thick a block as I feel this will contribute to wheel hop issues that typically come with the Tiger rear suspension geometry.
Greasing Bolts
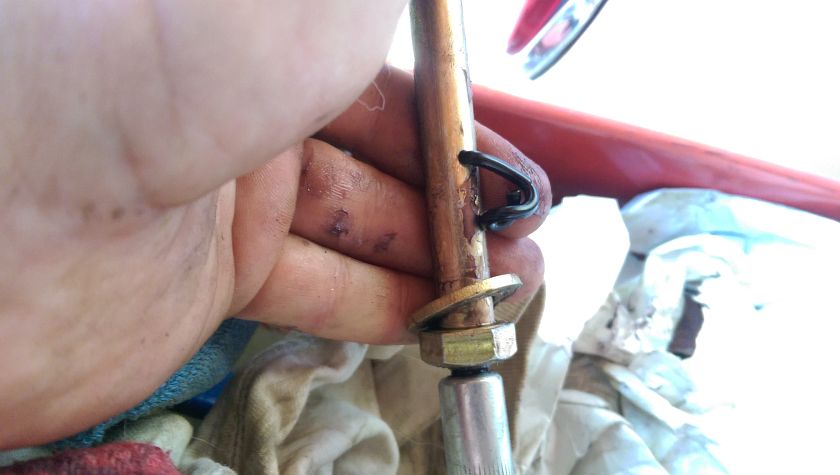
For my Tiger I replaced the stock 7/16" bolts with 1/2". This was needed to use off the shelf Bronze bearings and Delrin tubing for the bushing. Now it's possible to use the drilled bolts like the 4x4 guys use, not to mention a stronger bolt still then the 7/16" that was stock. A few pumps of grease does the trick, then I mush it around the bolt.
Mounting the Ford 9"
To get things back into the car I mounted the fronts of the springs. Then plopped the axle on the centering pins. I had the other ends of the axles raised a bit, and then one side at a time lifted the spring with the floor jack to bolt it to the shackle with Delrin shims between the leaf bushings and the shackle. Side view of the mess. Brakes and lines will go on later.
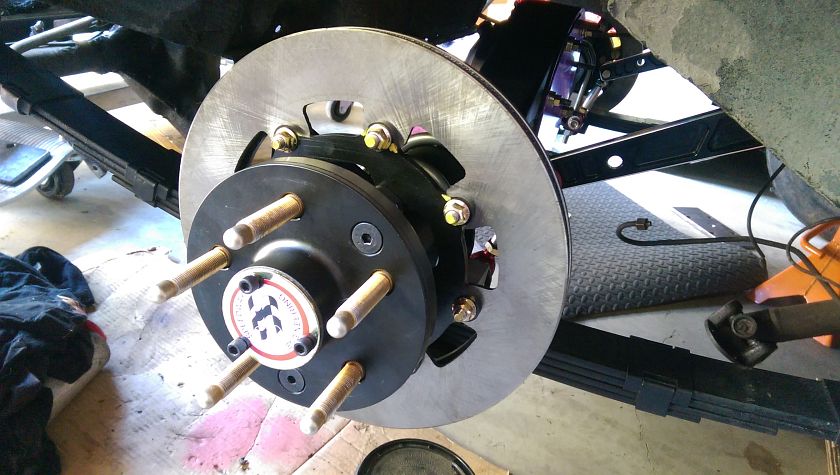
Mod-Lite Hub Installed
The hub and rotor assembly is installed. Bearings are greased up and set up. Axles have not been installed as yet since no drop out installed. Doesn't matter for moving around they don't need to be in. It's a nice feature of a full floating axle. You can see the sway bar arm behind the rotor. It may need a longer adjusting link, but will have to put some weight on the rear end to see how much it compresses the springs.
Wrap Up
That's about it for the Sunbeam Tiger Rear Axle Swap. More info on the Shackles and Bronze / Delrin Leaf Bushings can be found using your mouse and clicking the links you just saw.


